The Transformation Project Quick Start Guide: Training
This guide contains the Training Toolkit (which allows you to build your own customized workout program) and instructions on how to execute it.
But just to be clear:
You don't have to do THIS program to get results.
There are plenty of other effective workout programs out there (such as GZCLP), and you're free to use whichever one you like best.
The difference is that the Training Toolkit was made SPECIFICALLY to work in tandem with a fat loss phase.
It also gives you the freedom to customize it according to your exercise preferences and desired schedule.
By doing it this way, you get to lose fat, build muscle, and gain strength without burning out or risking injury.
So if you've had less than a year of consistent training under your belt, I believe that the Training Toolkit would be a perfect fit and you'll make FANTASTIC progress with it.
But at the end of the day, the choice is yours. If you want to do this program, feel free to proceed.
Let's get on with it, shall we?
💪 Building Your Workout Program
First things first: click here to download your copy of the Training Toolkit.
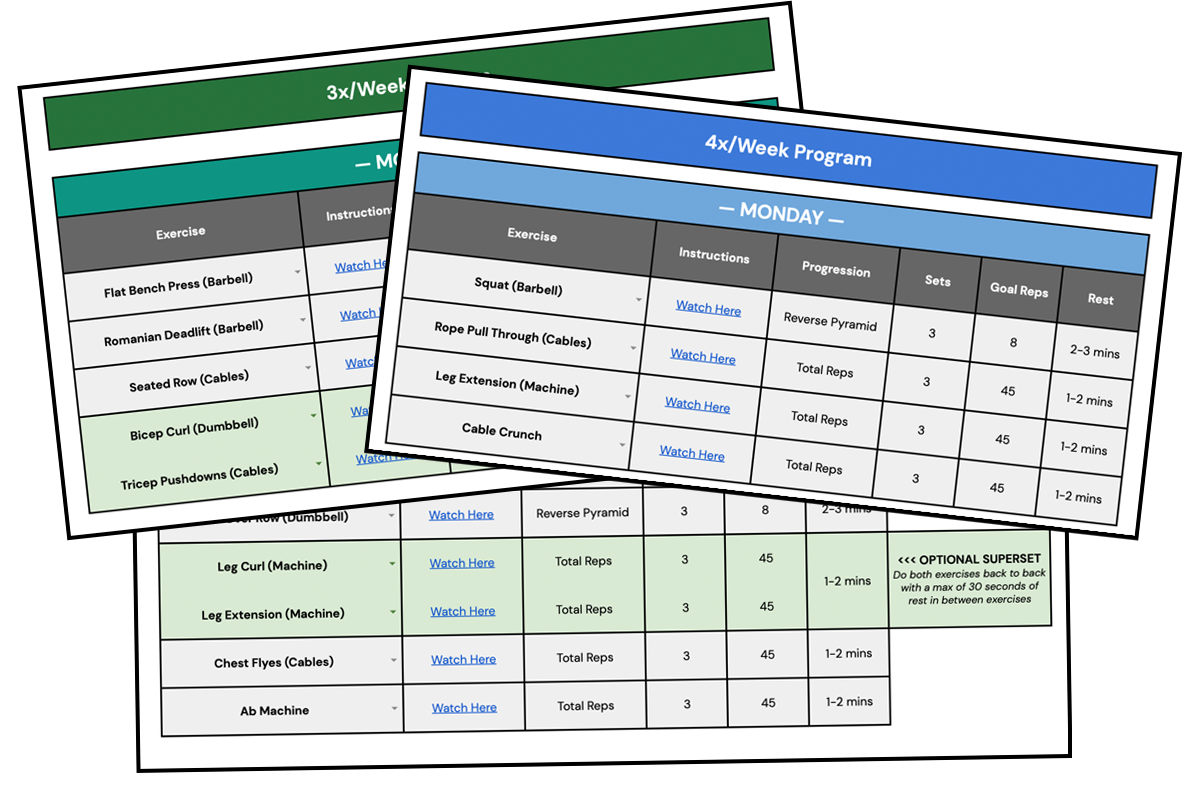
This spreadsheet contains a 3-day and a 4-day variation depending on how many times you want to workout per week.
Each workout will take roughly 45-60 minutes per session, depending on the exercises you do and how strict you are with your rest times in between sets.
IMPORTANT: pick a workout schedule that you can REALISTICALLY stick to.
The 4x/week program will yield VERY SLIGHTLY better results since you're in the gym more frequently – but ONLY IF you can actually do it 4 times a week.
If you find yourself consistently missing workouts, you're better off doing the 3x/week variation instead.
🏋️ Choosing Your Exercises
Each workout contains a default set of exercises that I personally like and recommend doing. These are a mix between barbell, dumbbell, and machine exercises.
I generally recommend free weights over their machine counterparts. They allow you to recruit more muscles, and thus result in more overall muscle growth (click here to read the study).
However, one of the common hang-ups for beginners is that they feel intimidated to go into the free weights section of the gym.
And as a beginner, your priority is to enjoy your training and build the workout habit.
So if you can't or don't want to do the specified exercise for any reason, just click the drop-down arrow and select another one from the list.
🤔 Figuring Out Your Starting Weights
If you're completely new to the gym, you'll need to take the first week or so to figure out which weights to use for each exercise.
So how do you do this exactly?
I'll answer this by presenting the image below:
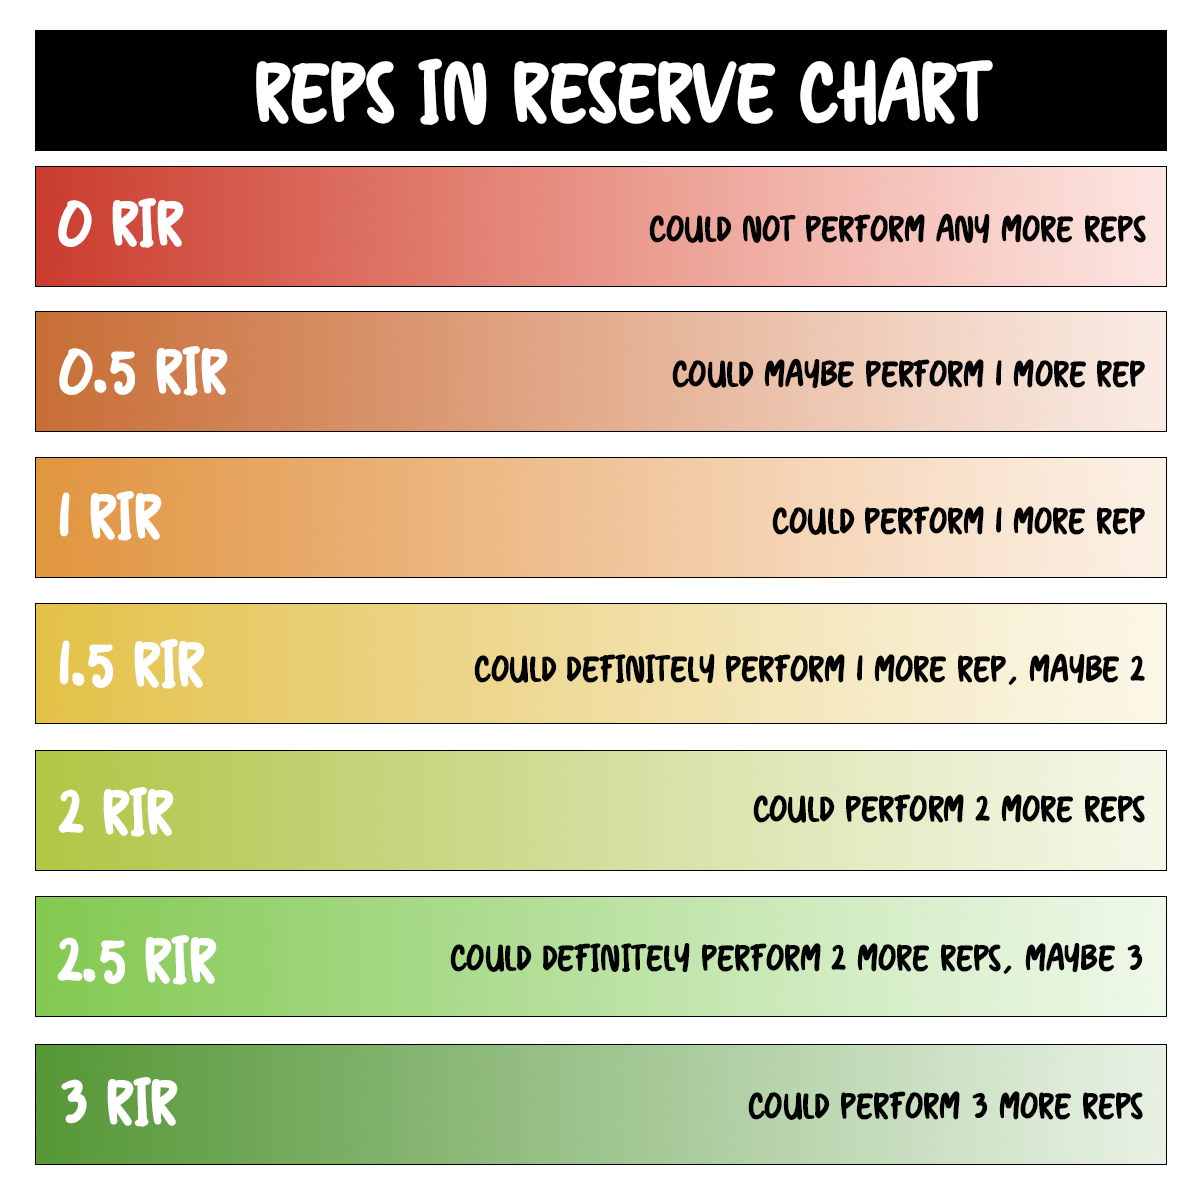
This image is showing the Reps In Reserve scale, which is what we use to gauge how difficult a set was.
0 RIR means going balls out and being physically incapable of performing another rep, while anything more than 3 RIR is probably too light.
This ensures that the weight isn't too light that there's not enough stimulus for the muscle to grow, but not too heavy that you're completely dead after the set.
Say you need to find your starting 3 x 8 starting weight for the dumbbell bench press.
- Grab the 25 kg dumbbells and try to do the exercise for 8 reps.
- You manage to get 5 reps before hitting failure (0 RIR). That's 3 reps short of the 8 reps you were aiming for, so obviously the weight is too heavy.
- On the next set, you decrease the weight down to 12.5 kg. This time, you manage to get 8 reps but felt like you could've done 4 or more reps before failing (4 RIR). This weight is too light.
- On the last set, you increase the weight to 17.5 kg and manage to get 8 reps. You feel like you could've done 2 more reps before failure (2 RIR), which is right in the sweet spot. This will be the weight you use moving forward.
Take the first week in the gym to figure out your starting weights for each exercise.
Once you've figured them out, you can move on to the progression model we're going to discuss next.
📈 How To Progress
If you can bench press 100 lbs for 3 sets of 10 reps today and that’s all you do every time you hit the gym for the next six months, your body will NOT change.
Over time, you need to be lifting more weight or doing more reps – ideally, both.
Your mission, should you choose to accept it, is to make the fastest progress that you possibly can over the shortest possible period of time in the safest manner possible.
In this program, we're going to do this by using two progression protocols. The Training Toolkit will indicate which method to use for each exercise.
Protocol 1: Reverse Pyramid Progression
For each exercise using the reverse pyramid protocol, the Training Toolkit indicates a goal rep. This is how many reps you should aim for during the first set.
If you hit this goal, this means you'll increase the weight for that exercise next workout.
Let's use the dumbbell bench press as an example again. In this case, let's say the goal is 8 reps.
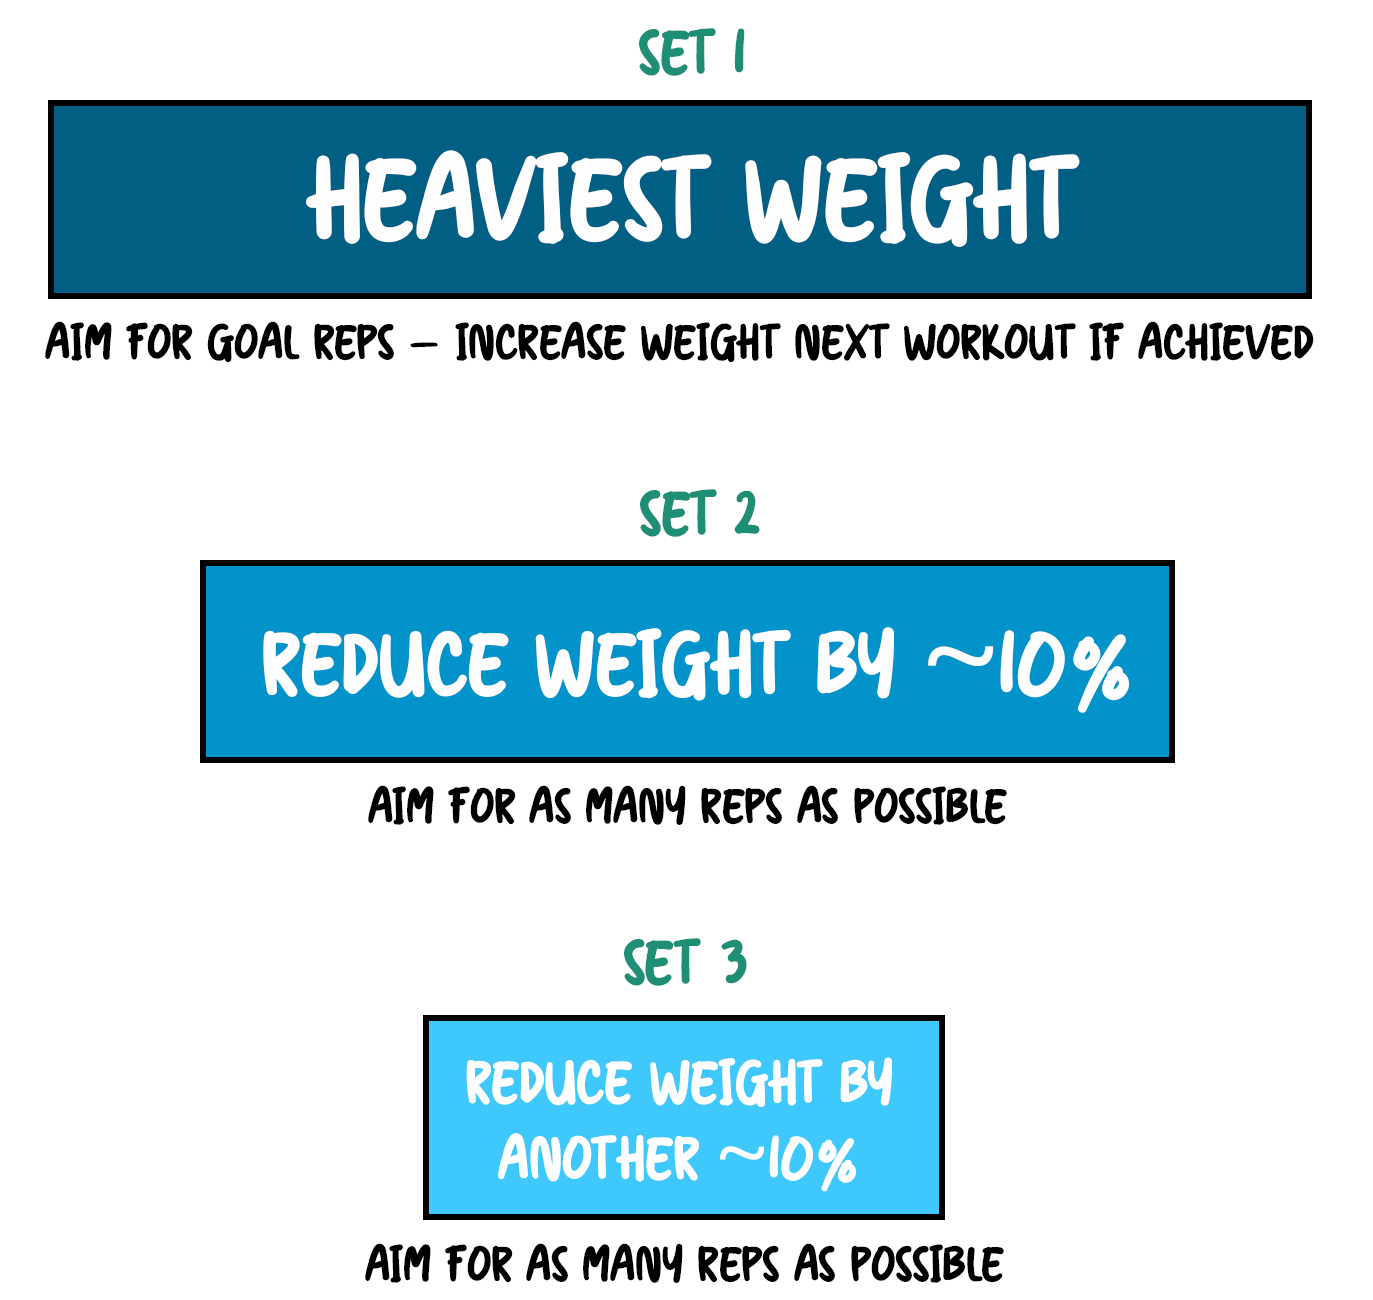
For set 1, you're going to use 17.5 kg dumbbells and aim for the goal reps.
If you can hit 8 reps or more during this workout, this means that you'll increase the weight next workout by smallest possible increment – this is most likely 20 kg for this exercise.
For set 2, you're going to reduce the weight by roughly 5 to 10% – go down to 15 kg in this case – and aim for as many reps as possible.
For set 3, you're going to reduce the weight AGAIN by another 5 to 10% – go down to 12.5 kg in this case – and aim for as many reps as possible again.
Keep in mind that as many reps as possible does not mean going to absolute failure.
It just means you need to go to the point where you won't be able to complete another rep if you made an attempt – this is 1 RIR in the reps in reserve scale.
Protocol 2: Total Reps Progression
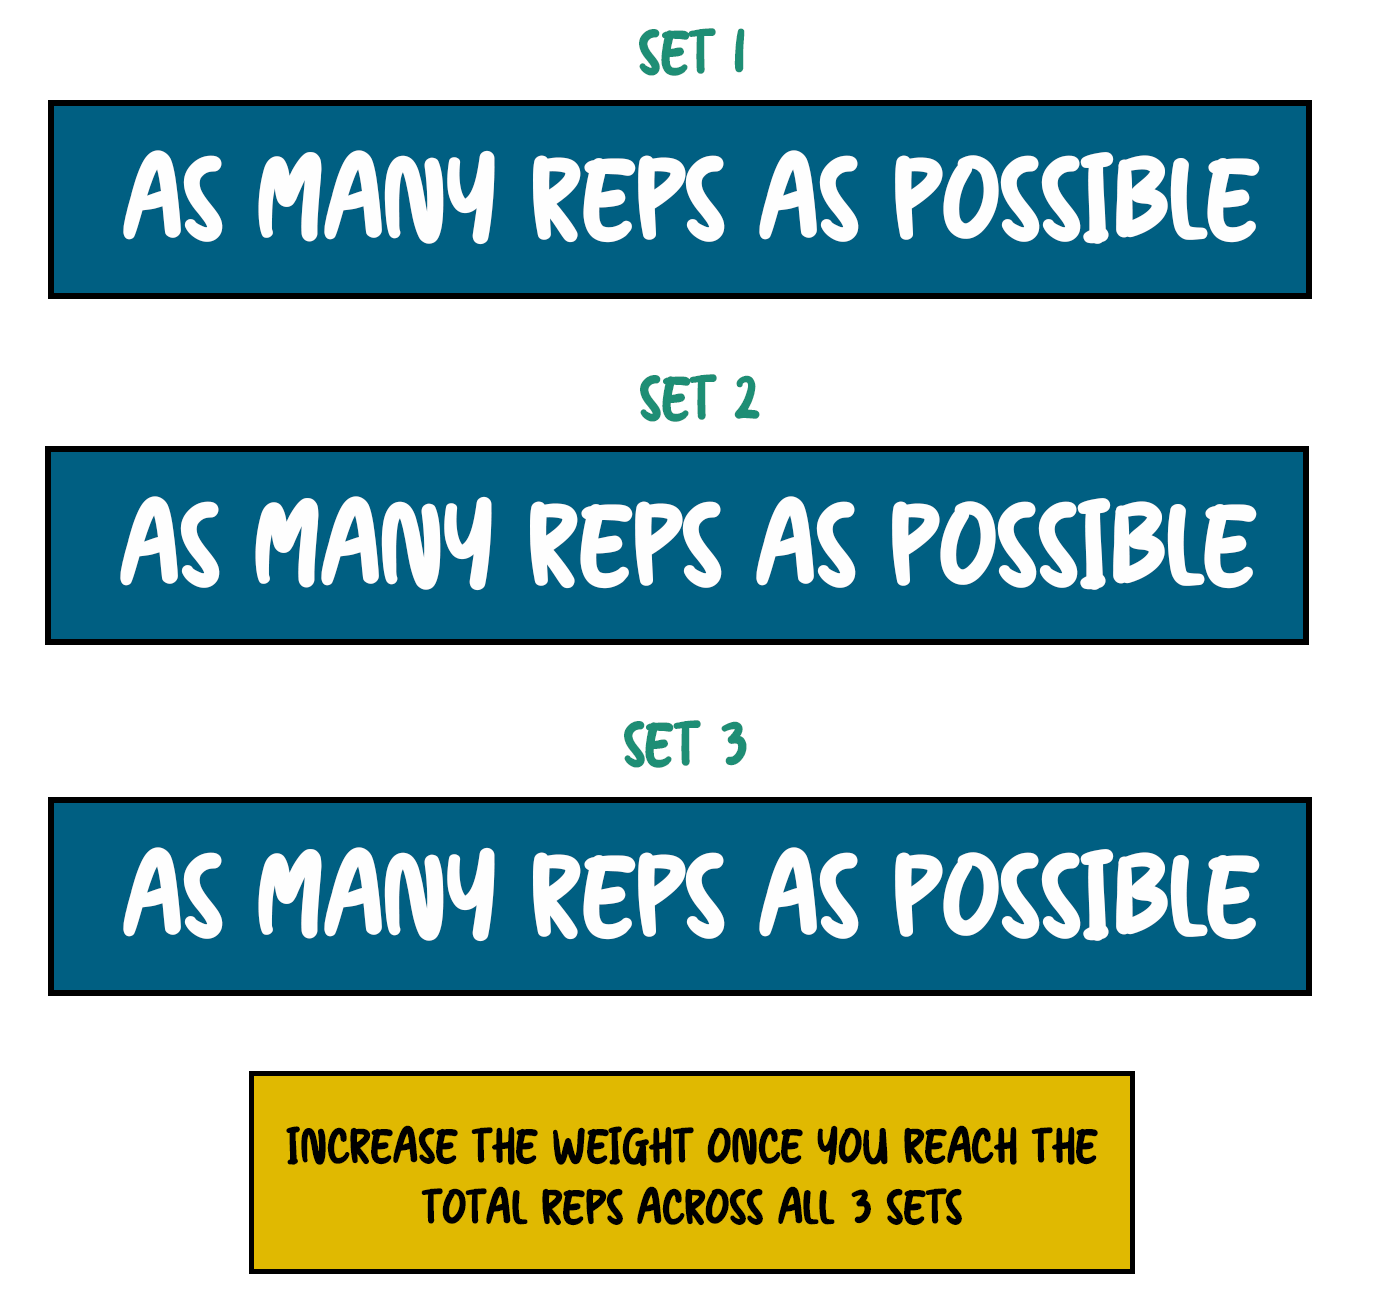
For this progression method, you'll use the same weight across all sets.
Then all you have to do is perform each set with as many reps possible and count the rep total at the end.
If you reached the total rep goal across all sets, increase the weight next session then repeat the process all over again.
Let's use the bicep curl as an example. In this case, let's say the total rep goal is 45 reps across 3 sets.
Say you managed to complete 18 reps on set 1, 15 reps on set 2, then 12 reps on set 3. This is a total of 45 reps, which is your total rep goal for this exercise.
That means you'll increase the weight by the smallest possible increment next session. If you were using 7.5 kg dumbbells, move up to 10 kg next workout.
If you failed to reach the total rep goal, just stay at the same weight and try to beat your rep totals next workout.
✍️ Logging Your Workouts
To make sure that you’re making progress, you need to be logging your lifts somewhere and track it over time.
Some people do this with a notebook and pen (or a Notes app on their phone), while others log it on a spreadsheet.
Personally, I prefer logging my workouts using a workout tracking app.
I’ve tried out a lot of workout trackers, and the one that I've been using for the past year and a half is an app called Alpha Progression.
While the free plan is great, what makes it a winner in my book is the premium "AI coaching" feature.
The app automates progression planning by analyzing your performance for each exercise, and recommends weight and rep targets for every set.
No need to manually figure out how you're going to progress – just do what the app tells you to do, and make gains all day.
"AI coaching" is part of the paid plan, but I've hooked you up with a 14-day free trial with an automatic 20% discount should you choose to continue using the premium features.
Sign up for a 14-day free trial of the app here.
(Note: the discount is only available if you sign up through the link above. Signing up through the App Store or Play Store will not work.)
🏃 But What About Cardio?
I'm happy to report that we're not going to be doing any form of high-intensity cardio whatsoever on this program.
No high intensity intervals, and no sprints that left me exhausted the rest of the day...
Instead, we're simply going to aim for a certain amount of steps per day.
People like to underestimate the power of walking. But when you look at how much calories you can burn, it’s easy to see how effective it can be for weight loss.
This is how much each person can burn every ~2,000 steps (roughly a mile):
- 120 lbs = 64 calories
- 140 lbs = 74 calories
- 160 lbs = 85 calories
- 180 lbs = 96 calories
- 200 lbs = 106 calories
- 220 lbs = 117 calories
- 240 lbs = 133 calories
To use an example, say you weigh around 180 lbs.
Aiming for 6,000 extra steps per day will burn you an extra 300 calories daily, or 2,100 calories weekly.
It may not seem like much at first, but this translates to an extra 0.6 lbs every week, or 2.4 lbs per month.
Since most sedentary people average 1,500 to 2,000 steps per day, aiming for a total of 8,000 to 12,000 daily steps should be a good target.
Feel free to break it down however you want to.
Some people prefer to do it all in one go (i.e. hopping on the treadmill after a workout), while others prefer to do it in smaller chunks (i.e. a walk in the morning, a walk after dinner, then at select times during the day).
I personally do a mix of both depending on my schedule for the day. Go and experiment to see which one works for you, then stick to that schedule.
If you already have a Fitbit or an Apple Watch, you can just track your steps using that.
If not, you don't have to get anything expensive – when I started actively tracking my steps, I used a cheap $40 step tracker and it did the job perfectly.
